In this tutorial, I’m going to explain how to set up your Raspberry Pi 3 without using a monitor or any other input-output devices. The setup is divided into 5 simple steps. Follow the steps to setup your Raspberry Pi in a headless mode, i.e without a keyboard, mouse or even a display. This is especially helpful if you’ve just got your Raspberry Pi and you don’t have anything else than just a power cable and a SD-Card.
Requirements For Setting up a Raspberry Pi without a Monitor
- Raspberry Pi ( duh ?? )
- Power cable and a power bank or an adapter to power the Raspberry Pi.
- SD-Card and SD-Card Reader
- Laptop or a Desktop
- Internet Connection
- Wi-Fi or a LAN Cable
Things not needed:
- Display
- Keyboard
- Mouse
- Cat (A cat or a cute dog will help in boosting the moral though)
Step 1 Download the Raspbian OS
Go to the official Raspberry Pi Downloads section and download the flavour of the OS you want to install. For this tutorial we’re going to use Raspbian, it’s an ARM port of the Debian OS and is really simple to use. If you later on want to be able to connect a display monitor to your Pi, go with the “Raspbian Stretch with desktop” version. Or if you just want to keep it simple and lite, go with the lite version. However you can install the Desktop environment later as well in the lite version.
Once you’ve downloaded the image on your computer, match the checksum on the downloads page with the checksum of your downloaded file. Verifying the checksum:
- Windows:
CertUtil -hashfile C:\Downloads\Raspbian.img SHA256 - Linux:
sha256sum /path/to/file - Mac:
shasum -a 256 /path/to/file
Step 2 Write the image to SD-Card
After verifying that you’ve downloaded the correct file and the checksum matches, you can proceed to burning the image on the SD-Card. This step can be simplified by using a third party tool for writing Raspberry Pi images to SD-Card for your platform. The tool we’re going to use is called Etcher, and can be downloaded from here.

First make sure your SD-Card is not write protected and flip the switch in the correct writeable position like shown in the image below. If Etcher still says your SD-Card is locked, just restart your system and try ejecting and re-inserting the SD-Card a few times. If that doesn’t work try doing this process in another system.
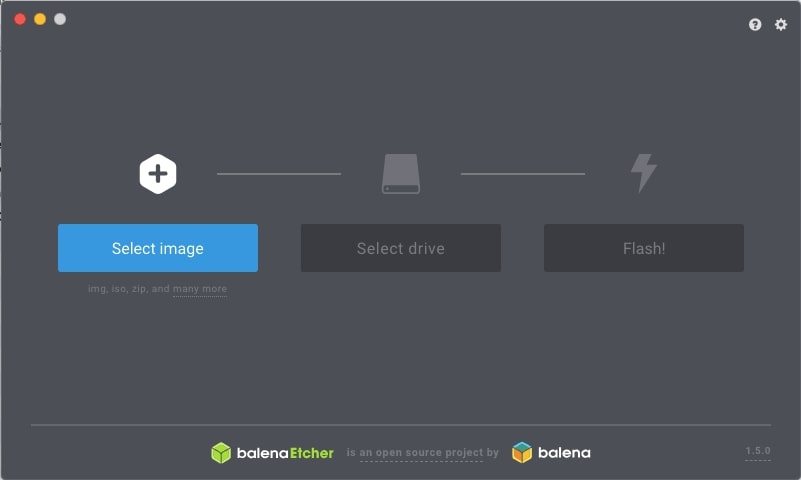
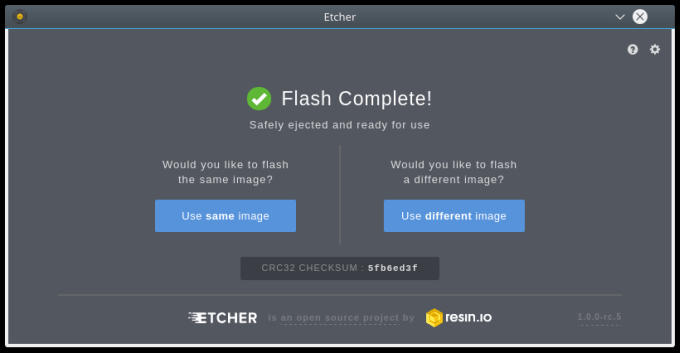
Now select the image file and the target device in Etcher and click Flash button. The flashing part will take anywhere from 2 minutes to 10 minutes depending upon the write speed of your SD card.
Step 3 Enabling ssh access to your Raspberry Pi
Since we do not have a monitor or any other input output devices attached to our Raspberry Pi, we will have to remotely login using another computer in order to control it. This can be done using the ssh command, or using Putty if you’re on Windows operating system. ssh access to the Raspberry Pi OS is not enabled by default in the Raspbian. So we’ll need to enable it by the following steps.
This step is simple, once you’ve successfully flashed the Raspbian OS image on the SD-Card, simply eject the SD-Card and take it out of the reader slot. Re-insert the card in the slot and now you should see a drive named boot in your system.
Now create an empty file named ssh in the boot directory. Please note that this file should not have any extensions such as `.txt` or `.dat`. This file will tell the Raspbian OS that ssh access needs to be enabled by default.
sshIt gets even simpler if you’re on a linux system, just right click in the window and open up a terminal in the boot directory. Then type the command touch ssh, this command will create an empty file called “ssh” in the current location.
Step 4 Enabling wireless access (Optional)
This step is optional and will allow your Raspberry Pi to be able to connect to a wifi network of your choice on the first boot. I prefer this way since It’s just a bit more convenient and doesn’t require a LAN cable.
Similar to the previous step, create a file named wpa_supplicant.conf in the same location as the file named ssh. Paste the following configuration in the file and edit the name and password of your wifi network, save the file.
country=IE
ctrl_interface=DIR=/var/run/wpa_supplicant GROUP=netdev
update_config=1
network={
scan_ssid=1
ssid=“wifi-network-name"
psk=“wifi-network-password"
key_mgmt=WPA-PSK
}
Step 5 Finding the IP of the Raspberry Pi and Connecting to the Pi
Once you’ve completed all the steps insert the Micro SD-Card into the Raspberry Pi, plug in the LAN cable if you skipped wifi setup step and turn the Raspberry Pi on by plugging it into a power supply.
Give it a minute to boot. After it has successfully started, we need to find out the IP of our Raspberry Pi. The IP of the Raspberry Pi can be found in multiple ways. The easiest of which is just logging into your wifi router and checking the connected devices.
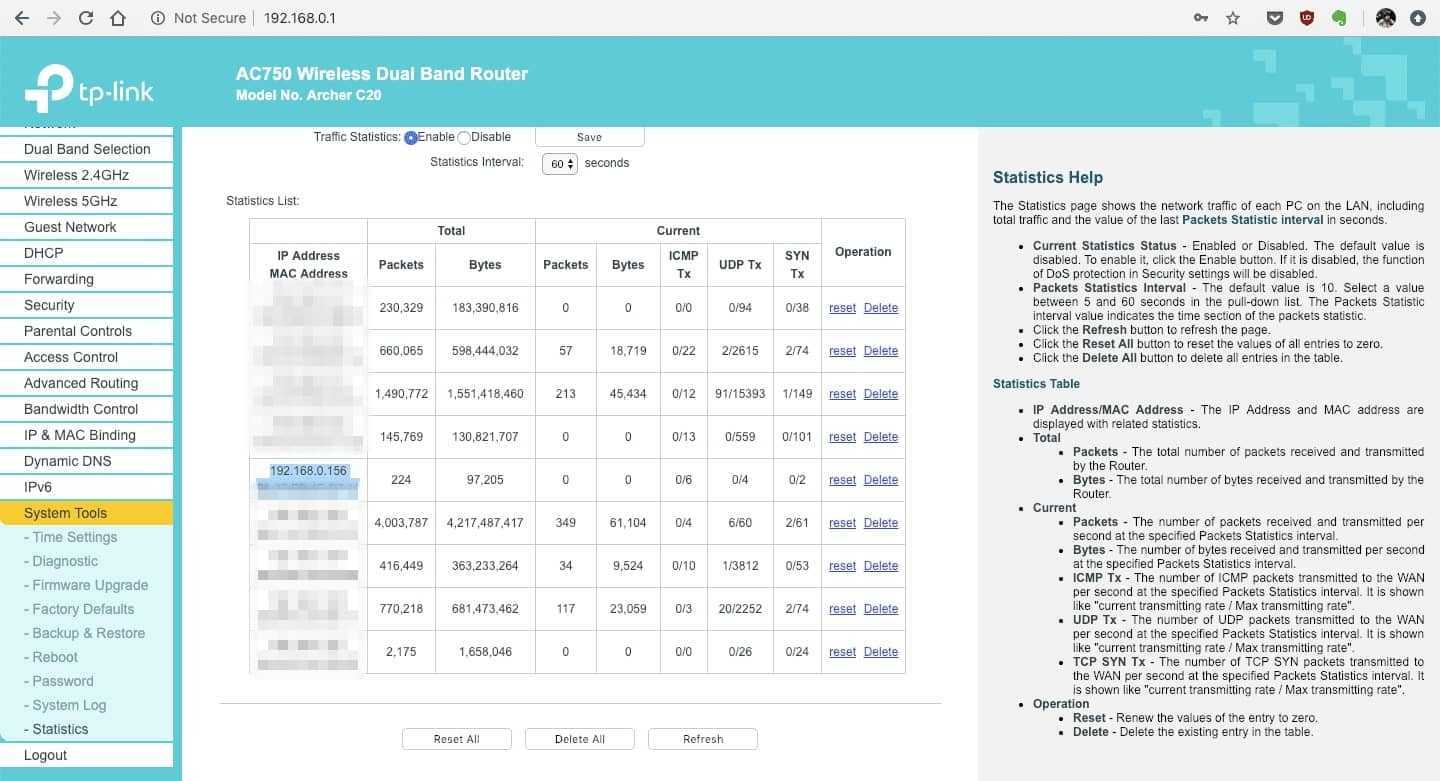
Method 1: Check Wifi Router Stats
Simply log into your wifi routers admin console and find the connected devices or statistics page for the router. You can do this before turning on the Raspberry Pi, so that you can identify the newly assigned IP.
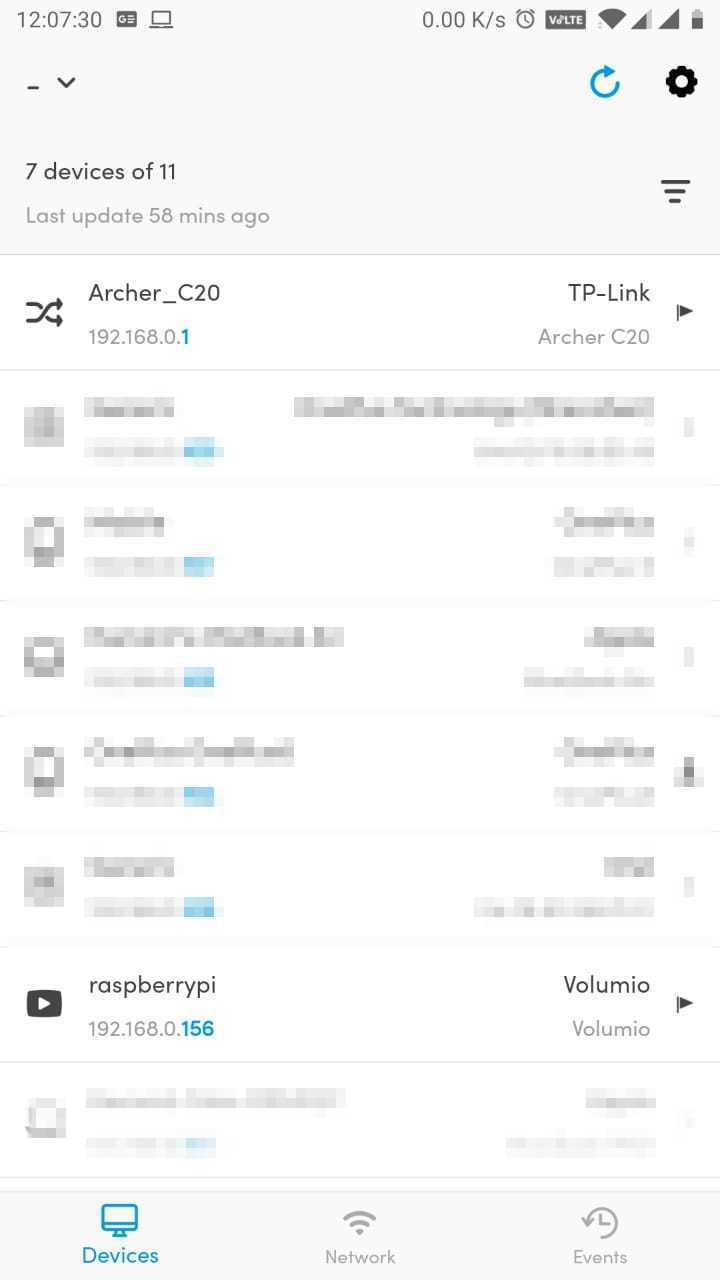
Method 2: Use an Android App
Download the app called Fing network tools from the Google play store, connect your android phone to the same wifi network and run a network scan.
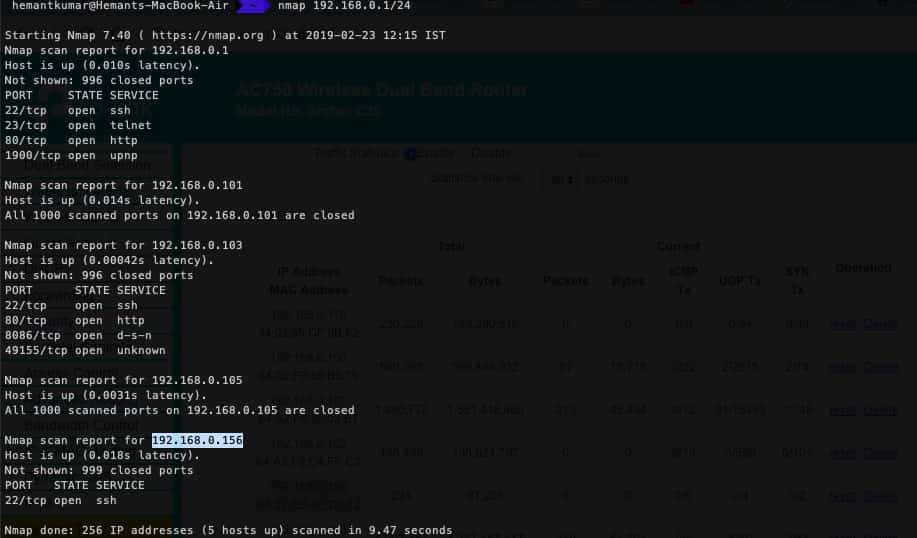
Method 3: Use nmap
nmap is a tool that comes pre-installed in various linux distributions. If it’s not currently installed in your system, simply run the following command.
Mac: brew install nmap
Linux (ubuntu): sudo apt-get install nmap
Linux (centos): sudo yum install nmap
Once nmap is installed, run the following command to find all the devices on the same network. nmap 192.168.0.1/24
Please note: The base IP (subnet) can differ depending upon your router configuration, but usually it’s either 192.168.0.1 or 192.168.1.1.
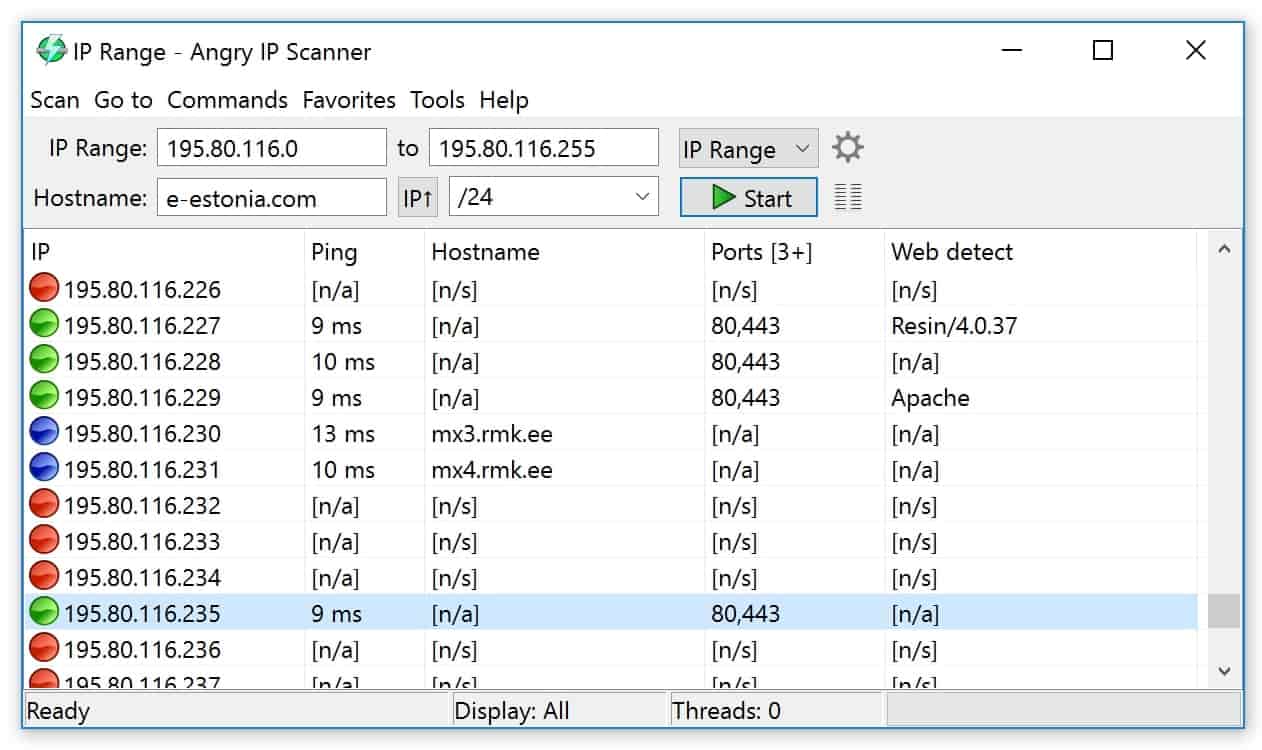
Method 4: Use any other network scanner on the computer
Just install the AngryIp scanner and connect your computer with the same network and hit scan.
After you’ve found the IP of your Raspberry Pi, you simply need to login remotely using the ssh command. Run: ssh pi@192.168.0.156 (replace the ip with the ip you’ve found). The default password for the user pi is raspberry. Make sure you change it after the first login to something more secure. Comment if you need help.