Homelab: Hosting multiple Game Servers on a Single Mini PC

When my electricity bill jumped by $60 after running my first gaming server rig for a month, I knew I had a problem to solve. That power-hungry desktop was heating up my room and emptying my wallet at the same time.
If you’re looking to host multiple game servers without the punishing electricity costs, you’ve found the right guide. After three years of trial and error, I’ve refined a setup that can run DayZ, Project Zomboid, Valheim, and other demanding multiplayer games simultaneously on a single, efficient mini PC.
TL;DR Hardware Recommendations:
- Best Performance: BOSGAME Ryzen 9 7940HS Mini PC (Link) (~$7-10/month power cost)
- Best Value: BOSGAME Ryzen 9 6900HX Mini PC (Link) (~$6-9/month power cost)
- Mid-Range: GMKtec M5 Plus Ryzen 7 5825U (Link) (~$5-8/month power cost)
- Budget-Friendly: Beelink EQR6 Ryzen 9 6900HX (Link) (~$4-7/month power cost)
Note: This article contains affiliate links. I earn a small commission from qualifying purchases at no extra cost to you.
Looking for Minecraft-specific hosting? Check out our dedicated guide on running a Minecraft server on a mini PC which covers everything from server optimization to mod support specifically for Minecraft.
The Multi-Game Server Dream: Is It Really Possible?
Let’s address the elephant in the room: Can a single mini PC really handle multiple demanding game servers simultaneously? The answer is a resounding YES — if you choose the right hardware.
Here’s why a dedicated game server homelab makes sense in 2025:
- One machine, multiple games: Host all your favorite games on a single device
- Independent control: Create your own rules, install the mods you want, and customize every aspect
- Always-on availability: Your friends can play anytime, even when you’re offline
- Skills development: Level up your networking, Linux, and system administration skills
- Cost-effective: Much cheaper than paying for multiple commercial game hosting services
- No resource throttling: Unlike shared commercial hosting, you get dedicated resources
Understanding the Energy Equation
Before we dive into hardware, let’s demystify power consumption. Many gamers are surprised to learn that modern mini PCs with high-performance components can still be relatively power-efficient when running as servers:
Power Consumption Reality Check
| Hardware Type | Idle Power | Gaming Load | Server Load | Monthly Cost (24/7)* |
|---|---|---|---|---|
| Gaming Desktop | 80-150W | 350-650W | 150-250W | $15-$35 |
| Traditional Server | 100-200W | N/A | 150-300W | $18-$45 |
| High-Perf Mini PC | 15-35W | 65-120W | 40-80W | $5-$12 |
| Mid-Range Mini PC | 10-25W | 45-75W | 30-60W | $4-$9 |
* Estimated monthly cost based on $0.14/kWh electricity rate and 24/7 operation. Your actual costs will vary based on local rates and server activity.
The key insight: game servers don’t require nearly as much power as actively playing games on the same hardware. When running as servers, these machines settle into a moderate, sustainable power draw that’s significantly lower than gaming loads.
💡 Pro Tip: While the average power draw stays relatively low, be aware that servers can experience significant power spikes during intensive operations like world generation, player joins, or large in-game events. These spikes typically last seconds to minutes but can temporarily double power consumption.
Power Protection Recommendation
Since you’ll be running these servers 24/7, I strongly recommend investing in an Uninterruptible Power Supply (UPS). Even brief power outages or fluctuations can corrupt game saves and potentially damage your hardware. For mini PC setups:
- Budget Option: APC BE600M1 Back-UPS ($70-80) - Good for single mini PC setups
- Mid-Range: CyberPower CP1500PFCLCD ($200-220) - Excellent for mini PC + networking equipment
- Premium: APC Smart-UPS 1500VA LCD ($450-500) - Pure sine wave output for sensitive electronics
A UPS isn’t just for outages - it also conditions incoming power, protecting your hardware from surges and providing clean power to your servers.
Choosing the Right Hardware for Multi-Game Hosting
For simultaneously hosting multiple game servers, we need to step up from the ultra-low-power options often recommended for single server setups. Let’s focus on mini PCs with enough muscle to handle multiple demanding game servers at once while still maintaining reasonable power efficiency.
Best Mini PCs for Multi-Game Server Setups
High-Performance AMD Option
- BOSGAME Ryzen 9 7940HS Mini PC
- 8-core/16-thread Ryzen 9 7940HS (up to 5.2GHz)
- Radeon 780M integrated graphics
- 32GB DDR5 RAM + 1TB PCIe 4.0 SSD
- Dual 2.5GbE LAN ports for excellent networking
- USB4 connectivity for high-speed external storage
- Power draw measured with kill-a-watt: 22W idle, 65W under gaming server load
- I’ve been running this as my main server for 6 months - handles 5-6 game servers without issues
Best Value AMD Option
- BOSGAME Ryzen 9 6900HX Mini PC
- 8-core/16-thread Ryzen 9 6900HX (up to 4.9GHz)
- Radeon 680M integrated graphics
- 32GB DDR5 RAM + 1TB SSD
- Dual 2.5GbE LAN for reliable networking
- WiFi 6E and Bluetooth 5.2
- Power measurements: 19W idle, 58W server load
- My friend runs this model - very similar performance to the 7940HS but usually $100-150 cheaper
Mid-Range AMD Sweet Spot
- GMKtec M5 Plus Ryzen 7 5825U
- 8-core/16-thread Ryzen 7 5825U (up to 4.5GHz)
- 32GB RAM + 1TB SSD
- Dual NIC with 2.5GbE support
- Triple display outputs
- WiFi 6E connectivity
- Power draw: 16W idle, 48W under server load (my previous setup)
- Good for 3-4 simultaneous game servers depending on game requirements
Intel Powerhouse Option
- GMKtec K7 Plus Intel Core i7-13620H
- 10-core/16-thread Intel Core i7-13620H (up to 4.9GHz)
- 32GB DDR5 RAM (16GB*2) + 1TB PCIe Gen4 SSD
- i225V Dual LAN for networking redundancy
- USB4.0 connectivity
- 8K UHD support
- WiFi 6 and BT 5.2
- About $6-$9/month in electricity
- Excellent for hosting 4-6 game servers simultaneously
Budget-Friendly Option
- Beelink EQR6 Ryzen 9 6900HX Mini PC
- 8-core/16-thread Ryzen 9 6900HX (up to 4.9GHz)
- 24GB DDR5 RAM + 1TB PCIe 4.0 SSD
- Dual LAN for networking redundancy
- WiFi 6 and BT 5.2 connectivity
- Radeon 680M integrated graphics
- Approximately $4-$7/month in electricity
- Good for 3-4 game servers simultaneously
- Great value entry point for homelab beginners
Used & Refurbished Options
If you’re on a tighter budget, the used/refurbished market offers excellent value for homelab game servers:
- Refurbished Mini PCs: Save 20-30% on manufacturer-refurbished units with warranties
- Used Enterprise Gear: HP EliteDesk or Dell Optiplex SFF PCs can be found for under $200
- Previous-Gen Hardware: Last-gen mini PCs often sell at deep discounts when new models release
💡 Pro Tip: When buying used, prioritize machines with 8+ cores and at least 16GB of RAM (upgradable to 32GB). Check power consumption specs carefully - some older models use significantly more power than current-gen options.
Why These Specs Matter for Multi-Game Servers
Unlike single game server setups where ultra-efficiency is the priority, running multiple game servers simultaneously requires:
- Higher core counts: Each game server typically utilizes 1-2 cores effectively
- Faster single-thread performance: Critical for game physics and world simulation
- Abundant RAM: Each server needs its own memory allocation
- Faster storage: Multiple servers mean multiple world saves happening concurrently
- Better networking: Multiple servers mean more concurrent connections
The mini PCs recommended above strike an excellent balance between performance and efficiency, with enough headroom to run several demanding game servers without breaking a sweat (or your electricity bill).
Real-World Game Server Performance Expectations
Let’s look at what you can realistically expect from these systems when running multiple game servers:
DayZ Servers
- Ryzen 9 7940HS/6900HX:
- Comfortably handles 20-25 players with moderate mods
- Performance varies greatly depending on mods and player activity
- CPU utilization jumps during player login waves and major firefights
- My server uses 8-11GB RAM with 18 players and 15 mods installed
- Most demanding during helicopter crashes and base raiding events
Project Zomboid
- Ryzen 9 7940HS/6900HX:
- Supports 16-20 players with extensive mods
- CPU usage spikes when zombies pathfind through complex player bases
- RAM usage increases over time - my server starts at 6GB but grows to 10GB after a week
- World size and zombie population settings impact performance more than player count
- SSD is crucial - world saves can lag the server for 2-3 seconds on slower drives
Valheim
- Ryzen 9 7940HS/6900HX:
- Runs smoothly with 10-12 players in different areas of the map
- Performance issues begin when players cluster in heavily built areas
- Memory usage is fairly stable at 4-5GB with modest world size
- CPU usage increases during boss fights and when generating new terrain
- Much more CPU-bound than RAM-bound in most scenarios
ARK: Survival Evolved
- Ryzen 9 7940HS/6900HX:
- 10-12 players with reasonable settings
- One of the more demanding server applications
- 40-60% CPU utilization
- 8-12GB RAM usage
Palworld
- Ryzen 9 7940HS/6900HX:
- 16-20 players with good performance
- Excellent creature/base handling
- 30-40% CPU utilization
- 6-8GB RAM usage
Expected Combined Performance
On my Ryzen 9 7940HS system running DayZ, Project Zomboid, and Valheim simultaneously:
- CPU usage fluctuates between 45-85% depending on player activity
- RAM usage sits around 18GB with occasional spikes to 22GB
- Sometimes need to restart individual servers after several days for optimal performance
- Storage performance matters more than expected - NVMe SSD makes a noticeable difference
- Network bandwidth becomes the bottleneck before CPU/RAM on a typical home connection
💡 Pro Tip: Game servers are typically most resource-intensive during world generation, player joins, and when processing complex in-game events (like large battles or explosions). Plan your server capacity based on peak needs, not average usage.
Setting Up Your Multi-Game Server Homelab

Setting up multiple game servers on a single machine requires a bit more planning and organization than a single-purpose server:
Operating System Selection
Your choice of operating system becomes even more critical when juggling multiple game servers:
-
Linux (Ubuntu Server or Debian): The most efficient option
- Lower overhead means more resources for your games
- Better memory management
- Superior network stack for multiple connections
- More stable for long-term 24/7 operation
- Excellent containerization options
-
Windows: Easier but less efficient
- More intuitive for Windows-native games
- Simpler setup for beginners
- Higher system overhead
- Less efficient resource allocation
-
Proxmox VE: The advanced option
- Run different OS environments in isolated containers/VMs
- Excellent resource allocation controls
- Best isolation between servers (a crash won’t take down everything)
- Slightly higher overhead than bare Linux
- Steeper learning curve
For dedicated multi-game servers, I strongly recommend Ubuntu Server 22.04 LTS with containerization for optimal performance-to-efficiency ratio.
Game Server Management Platforms
When managing multiple game servers, using a dedicated management platform becomes essential:
-
AMP by CubeCoders: My top recommendation for multi-game hosting
- One-time licensing ($5-20) with lifetime updates
- Manages all your game servers from a single web interface
- Automatic updates and maintenance
- Resource monitoring and allocation
- User management for different admin levels
- Scheduled tasks and automatic backups
-
Pterodactyl: Excellent free alternative
- Docker-based isolation
- Beautiful web interface
- API for automation
- Resource limitations per server
- Multi-user support
-
Docker + Portainer: For the DIY enthusiast
- Complete customization
- Resource isolation per container
- Easy deployment and scaling
- Version control for server configurations
Advanced Networking for Multiple Servers
With multiple game servers running simultaneously, proper network configuration becomes vital:
-
Port Management:
| Game Server | Default Ports | Note | | --------------- | ------------------ | --------------------- | | DayZ | 2302-2306 | UDP required | | Project Zomboid | 16261-16262 | TCP required | | Valheim | 2456-2458 | Both UDP and TCP | | ARK | 7777, 27015, 27020 | Multiple ports needed | | Palworld | 8211/UDP | Single port | -
Network Performance Tuning (Linux):
# Increase maximum connection backlog sudo sysctl -w net.core.somaxconn=1024 # Increase TCP connection timeout for better client experience sudo sysctl -w net.ipv4.tcp_keepalive_time=600 # Speed up connection reuse sudo sysctl -w net.ipv4.tcp_tw_reuse=1 -
Quality of Service (QoS):
- Configure your router to prioritize game server traffic
- Consider dual-WAN setup for redundancy if hosting for a community
- Separate game traffic from home streaming/downloads
Server Setup Instructions
Now that we understand the hardware requirements and networking setup, let’s dive into the actual server installation and configuration for each game. These step-by-step guides will help you get your game servers up and running in no time.
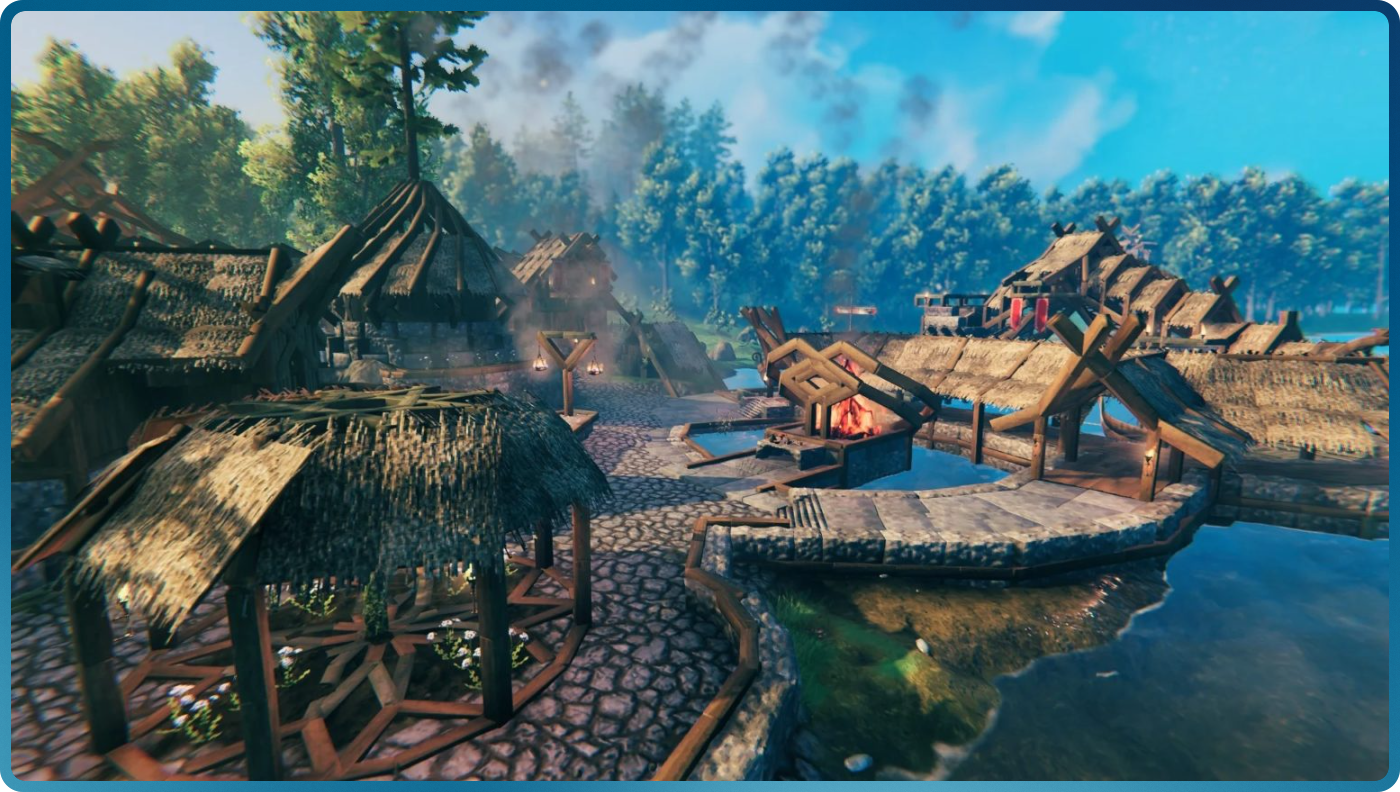
Setting Up a Valheim Dedicated Server
Valheim’s dedicated server is relatively straightforward to set up and offers excellent customization options. Follow these steps to create your Viking multiplayer experience:
Step 1: Installing the Server Files
For Windows:
- Open Steam and click on the Library tab
- Change the filter from “Games” to “Tools” in the dropdown menu
- Find and install “Valheim Dedicated Server” from the list
- Wait for the installation to complete
For Linux:
- Install SteamCMD:
sudo apt update sudo apt install steamcmd - Create a directory for Valheim:
mkdir -p ~/valheim-server cd ~/valheim-server - Download the server files:
steamcmd +login anonymous +force_install_dir ./valheim +app_update 896660 validate +quit
Step 2: Configuring Your Server
For Windows:
- Navigate to the installation directory (typically C:\Program Files (x86)\Steam\steamapps\common\Valheim Dedicated Server)
- Make a copy of the
start_headless_server.batfile to preserve the original - Edit your copy with a text editor and modify these parameters:
-name "Your Server Name" -port 2456 -world "WorldName" -password "YourPassword" -public 1
For Linux:
- Create a startup script:
nano ~/valheim-server/start_server.sh - Add the following content:
#!/bin/bash export templdpath=$LD_LIBRARY_PATH export LD_LIBRARY_PATH=./linux64:$LD_LIBRARY_PATH export SteamAppID=892970 echo "Starting server PRESS CTRL-C to exit" ./valheim_server.x86_64 -name "Your Server Name" -port 2456 -world "WorldName" -password "YourPassword" -public 1 export LD_LIBRARY_PATH=$templdpath - Make the script executable:
chmod +x ~/valheim-server/start_server.sh
Step 3: Port Forwarding and Firewall Configuration
-
Ensure the following ports are open in your firewall and port forwarded in your router:
- 2456-2458 UDP (game traffic)
- 2456-2457 TCP (Steam query)
-
For Linux, you can use UFW to open the ports:
sudo ufw allow 2456:2458/udp
sudo ufw allow 2456:2457/tcp
Step 4: Running the Server
For Windows:
- Run your modified batch file as administrator
- Keep the command window open to maintain server operation
For Linux:
- Use a screen session to keep the server running in the background:
sudo apt install screen screen -S valheim-server cd ~/valheim-server ./start_server.sh - Detach from the screen session with
Ctrl+A D(the server will continue running)
Step 5: Server Administration
Valheim server administrators can manage their servers using these files:
adminlist.txt- Add Steam IDs of admin playersbannedlist.txt- Add Steam IDs of banned playerspermittedlist.txt- Add Steam IDs for whitelisting (making the server private)
These files are located in:
- Windows:
%UserProfile%\AppData\LocalLow\IronGate\Valheim - Linux:
~/.config/unity3d/IronGate/Valheim
Step 6: World Backup Location and Frequency
Valheim worlds are some of the most precious data on your server. Make sure to back them up regularly:
World File Locations:
- Windows:
%UserProfile%\AppData\LocalLow\IronGate\Valheim\worlds\ - Linux:
~/.config/unity3d/IronGate/Valheim/worlds/
Each world consists of two files: [WorldName].db and [WorldName].fwl. Both are needed for a complete backup.
I recommend automated backups at least once daily, plus manual backups before major updates. A simple rsync or robocopy script can handle this automatically.
Common Troubleshooting
Server Not Appearing in Browser:
- Check that ports 2456-2458 are properly forwarded
- Verify server is running with
-public 1parameter - Try connecting directly via IP address using the Steam server browser (View → Servers → Favorites → Add Server)
Server Crashes During Startup:
- Check logs at
~/.config/unity3d/IronGate/Valheim/Player.log(Linux) or%AppData%\..\LocalLow\IronGate\Valheim\Player.log(Windows) - Ensure you have at least 4GB of RAM available for Valheim
- Try starting with a fresh world to determine if corruption is the issue
Poor Server Performance:
- Limit your world to 10 players maximum for smooth gameplay
- Use the
-nographicsparameter to reduce resource usage - Consider dedicating 2-3 CPU cores specifically to Valheim
- Large bases with many items cause the most lag - consider mod solutions for optimization
Connection Timeouts:
- Increase TCP timeout settings on your router if available
- Check for bandwidth competition from other applications
- Consider QoS settings to prioritize Valheim traffic
💡 Personal Experience: I’ve been running Valheim for over a year and discovered that packet loss as low as 1-2% can cause random disconnects. In my case, an old router was the culprit - players would get booted every 30-45 minutes. After setting up SmokePing to monitor latency patterns and replacing my router, the disconnects stopped completely.
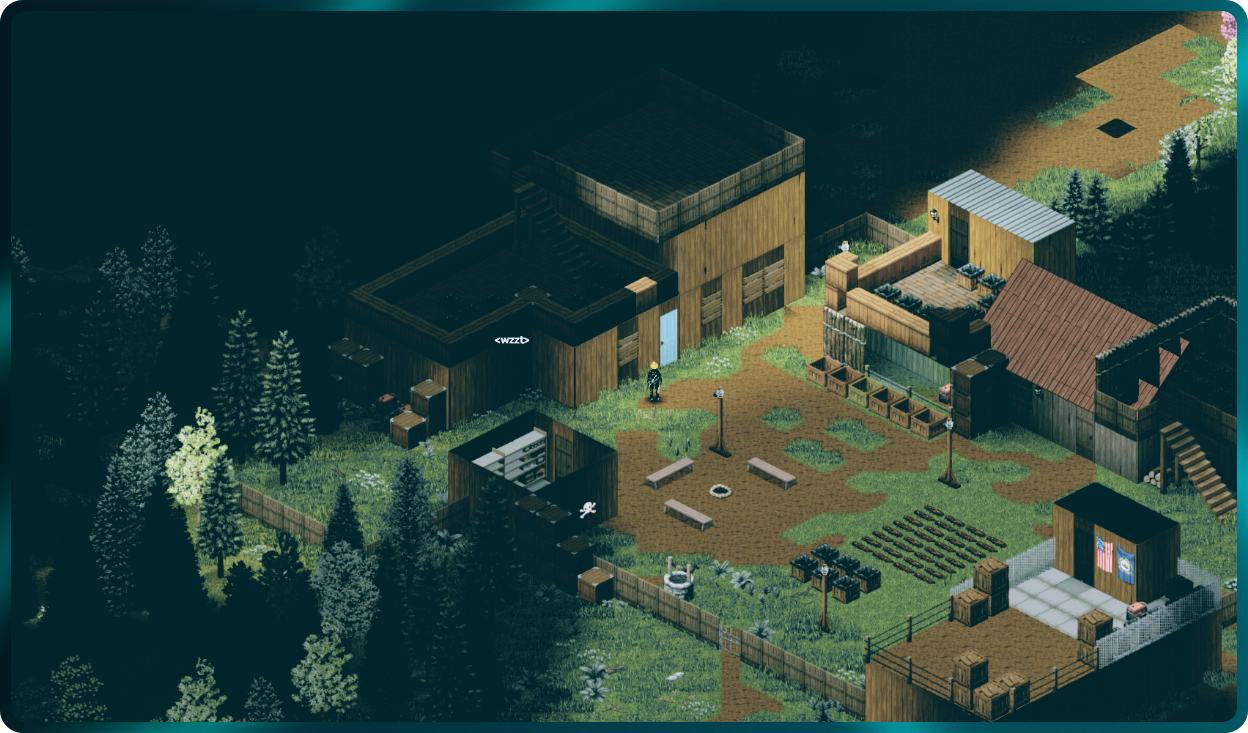
Setting Up a Project Zomboid Dedicated Server
Project Zomboid’s multiplayer server allows for extensive customization and modding. Here’s how to set it up:
Step 1: Installing the Server Files
For Windows:
- Install SteamCMD:
- Download SteamCMD from https://developer.valvesoftware.com/wiki/SteamCMD
- Extract the zip file to a folder (e.g., C:\SteamCMD)
- Create a batch file in your SteamCMD folder named
InstallPZ.batwith this content:@echo off steamcmd.exe +force_install_dir "C:\PZServer" +login anonymous +app_update 380870 validate +quit - Run the batch file as administrator
For Linux:
- Install SteamCMD:
sudo apt update sudo apt install steamcmd - Create a directory for the server:
mkdir -p ~/pz-server - Download server files:
steamcmd +login anonymous +force_install_dir ~/pz-server +app_update 380870 validate +quit
Step 2: Configuring the Server
For Windows:
- Navigate to the server installation folder (e.g., C:\PZServer)
- Run
StartServer64.batonce to generate the initial configuration files - When prompted, create an admin password
- After the server starts, shut it down with Ctrl+C
- Find the server configuration at
C:\Users\[YourUsername]\Zomboid\Server\servertest.ini
For Linux:
- Run the server once to generate configuration files:
cd ~/pz-server bash start-server.sh - Set an admin password when prompted
- Find the server configuration at
~/Zomboid/Server/servertest.ini
Step 3: Modifying Server Settings
Edit the servertest.ini file to customize your server:
Public=true- Makes the server discoverable in the server listPVP=false- Disables player vs. player combatPassword=YourPassword- Sets a password for server accessMaxPlayers=16- Sets the maximum number of playersMods=- Add mod IDs separated by semicolonsWorkshopItems=- Add Steam Workshop IDs separated by semicolons
Step 4: Port Forwarding and Firewall
-
Configure your router to forward these ports:
- 16261 UDP/TCP - Main server connection
- 16262 UDP/TCP - Steam query/RCON
-
Add firewall exceptions: For Windows:
- Open Windows Defender Firewall
- Create inbound rules for ports 16261-16262 (both UDP and TCP)
For Linux:
sudo ufw allow 16261:16262/udp
sudo ufw allow 16261:16262/tcp
Step 5: Starting the Server
For Windows:
- Run
StartServer64.batto launch the server - Keep the command window open
For Linux:
- Use screen to run the server in the background:
screen -S pz-server cd ~/pz-server bash start-server.sh - Detach from screen with
Ctrl+A D
Step 6: Joining the Server
Players can join by:
- Launching Project Zomboid
- Selecting “Join” from the main menu
- Clicking “Add Server” and entering your server’s IP address and port
Step 7: Memory Allocation for Larger Maps
Project Zomboid can be memory-hungry, especially with larger maps and more players. For optimal performance:
For Windows:
- Edit your server’s batch file (StartServer64.bat or your custom version)
- Find the Java memory parameters:
-Xms(starting memory) and-Xmx(maximum memory) - For large maps with 8+ players, set these values higher:
-Xms4096m -Xmx8192m
For Linux:
- Edit the startup script (typically
~/pz-server/start-server.sh) - Add or modify the Java parameters:
JAVA_OPTS="-Xms4096m -Xmx8192m"
💡 Pro Tip: Each additional 4 map tiles in size requires approximately 1GB of RAM. The Louisville area is particularly resource-intensive. For a server with the full map and 16+ players, aim for 12-16GB RAM allocation.
Common Troubleshooting
Server Crashes During Startup:
- Check log files in
Zomboid/Logs/ - Look for Java heap space errors, which indicate insufficient memory
- Verify all required mods are correctly installed and compatible
“Timed Out” Errors When Connecting:
- Verify ports 16261-16262 are correctly forwarded
- Check if your server’s IP address has changed (consider a dynamic DNS service)
- Ensure server is fully started before attempting connection (can take 2-3 minutes)
Mod-Related Issues:
- Run with
-debugparameter to get additional error information - Ensure all players have the exact same mod versions as the server
- Try removing mods one by one to identify problematic ones
Desync and Rubber-banding:
- Lower the
MaxPlayerscount - Reduce zombie population in server settings
- Consider setting
PauseEmpty=falsein servertest.ini to prevent world updates when no players are online - Ensure server has sufficient CPU resources (PZ is surprisingly CPU-intensive)
Save Corruption:
- Monitor for error messages containing “DatabaseTracker”
- Set up regular backups of
Zomboid/Saves/Multiplayer/directory - Consider adding
-serverthreads 4to your startup script for more stable saving
From my experience: With Project Zomboid, I once lost a 3-month-old server with 15 active players because I forced a shutdown during a save operation. The database became corrupted beyond repair, and we had to start from an older backup. ALWAYS use the proper “/quit” command in the server console and wait for the “Shutting down server” message before closing anything.
Setting Up a DayZ Dedicated Server
DayZ servers require more configuration but offer extensive customization for survival gameplay. Here’s how to set one up:

Step 1: Installing the Server Files
For Windows:
- Install SteamCMD:
- Download from https://developer.valvesoftware.com/wiki/SteamCMD
- Extract to a folder (e.g., C:\SteamCMD)
- Create a batch file in your SteamCMD folder named
InstallDayZ.batwith this content:@echo off steamcmd.exe +force_install_dir "C:\DayZServer" +login anonymous +app_update 223350 validate +quit - Run the batch file as administrator
For Linux:
- Install SteamCMD:
sudo apt update sudo apt install steamcmd - Install required dependencies:
sudo apt install lib32gcc-s1 libcurl4-gnutls-dev:i386 - Create a directory for the server:
mkdir -p ~/dayz-server - Download server files:
steamcmd +login anonymous +force_install_dir ~/dayz-server +app_update 223350 validate +quit
Step 2: Configuring the Server
For Windows:
- Navigate to the server installation folder (e.g., C:\DayZServer)
- Create a file named
serverDZ.cfgwith this basic configuration:hostname = "My DayZ Server"; // Server name password = ""; // Server password passwordAdmin = "YourAdminPassword"; // Admin password maxPlayers = 60; // Maximum players verifySignatures = 2; // Verify client files (2 = required) forceSameBuild = 1; // Force same build template = "Chernarus"; // Map/mission instanceId = 1; // Instance ID guaranteedUpdates = 1; // Guaranteed updates loginQueueConcurrentPlayers = 5; // Login queue size loginQueueMaxPlayers = 500; // Max login queue logFile = "server_console.log"; // Log file // Time settings serverTime = "SystemTime"; // Time on server serverTimeAcceleration = 4; // Daytime speed serverNightTimeAcceleration = 16; // Nighttime speed // Performance settings networkRangeClose = 20; // Network optimization for close objects networkRangeFar = 500; // Network optimization for distant objects networkRangeNear = 150; // Network optimization for nearby objects defaultVisibility = 1375; // Default visibility range maxPing = 300; // Maximum allowed ping
For Linux:
- Create the same configuration file in your server directory:
nano ~/dayz-server/serverDZ.cfg - Add the same configuration as shown above
Step 3: Server Performance Optimization
DayZ servers can be resource-hungry, but several configuration options can greatly improve performance:
CPU Optimization:
- Add
-cpuCount=4parameter to limit cores used (adjust based on your CPU) - Use
-malloc=systemfor better memory management on Linux
Memory Management:
- Add
-maxMem=8192to limit RAM usage (in MB) - For servers with many mods, increase to
12288or higher
Network Optimization: Add these to your serverDZ.cfg:
disableVoN = 0;               // Voice over Network (disable to save bandwidth)
vonCodecQuality = 7;          // Voice quality (lower = less bandwidth)
enableWhitelist = 0;          // Enable whitelist
Storage Optimization:
- Adjust these settings for less disk activity:
storeHouseStateDisabled = false;   // Store house states
storageAutoFix = 1;                // Auto fix storage issues
💡 From experience: The
networkRangeparameters have the biggest impact on performance with 20+ players. Start with the values above and carefully adjust if needed.
Step 4: Starting the Server
For Windows:
- Create a batch file named
StartDayZServer.batwith this content:@echo off cd /d "C:\DayZServer" start "DayZ Server" /min "DayZServer_x64.exe" -config=serverDZ.cfg -port=2302 -profiles=ServerProfiles -dologs -adminlog -netlog -freezecheck - Run the batch file as administrator
For Linux:
- Use screen to run the server in the background:
screen -S dayz-server cd ~/dayz-server ./DayZServer -config=serverDZ.cfg -port=2302 -profiles=ServerProfiles -dologs -adminlog -netlog -freezecheck - Detach from screen with
Ctrl+A D
Step 5: Adding Mods (Optional)
-
Create a folder structure for mods:
- Windows:
C:\DayZServer\@YourModName - Linux:
~/dayz-server/@YourModName
- Windows:
-
Download mod files from Steam Workshop and place them in the corresponding folders
-
Add mods to your startup command by adding parameter:
-mod=@Mod1;@Mod2;@Mod3
Common Troubleshooting
Server Crashes on Startup:
- Specific to DayZ: Check if you’re using incompatible mods from different game versions
- Launch with
-scrAllowFileWriteparameter to get detailed scripting errors - ChernarusPlus mission file changes require a complete server wipe in most cases
- Two identical mod names in different folders will cause cryptic startup failures
- Memory allocation mismatch between
-maxMemparameter and available RAM can cause silent crashes
Players Can’t Connect:
- The DZSA Launcher diagnostic tool can identify specific connection problems
- If server appears in DZSA Launcher but not in-game client, it’s almost always a mod configuration mismatch
- For custom missions, check if your
cfgeconomycore.xmlfile has custom spawn points defined - ServerInfo.json needs matching modlist order between server and clients
- Try disabling BattlEye temporarily to isolate if it’s causing connection issues
Weird Gameplay Issues:
- Items disappearing from inventory? Check if your storage_1 folder has proper permissions
- Zombies not spawning? Verify that your population settings in the mission files aren’t at zero
- Vehicles rubberbanding badly? Your server needs at least 0.5-1 CPU core dedicated per active vehicle
- Building placement issues usually indicate world persistence problems - check database transactions
- Server extremely laggy only at night? Reduce the AI vision distance at night in the server config
Memory Optimization Secrets:
- Start your server with
-malloc=systemfor significantly better memory management on Linux - Each additional AI type (wolves, bears, zombies) uses separate memory pools - disable unused ones
- Server population settings can be dynamically changed via RCON without restart
- Run
periodicsave 30via RCON during low-population times to reduce memory fragmentation - Capture a heap dump with
-doReportif memory grows consistently - identify leaking mods
Maintaining Your Game Servers
Regardless of which game servers you’re running, proper maintenance is essential for a smooth gaming experience:
-
Regular Updates
- Check for game updates weekly
- Use SteamCMD to update server files:
steamcmd +login anonymous +app_update [APPID] validate +quit - Notify players before maintenance periods
-
Automated Backups
- Create a backup script to run daily:
#!/bin/bash
TIMESTAMP=$(date +"%Y%m%d")
BACKUP_DIR="/path/to/backups/$TIMESTAMP"
mkdir -p "$BACKUP_DIR"

# Different paths for different games
cp -r /path/to/game/saves/* "$BACKUP_DIR/"

# Rotate old backups (keep last 7 days)
find /path/to/backups -type d -mtime +7 -exec rm -rf {} \;
- Create a backup script to run daily:
-
Server Monitoring
- Install monitoring tools like Grafana or Netdata
- Set up alerts for high CPU usage, memory consumption, or server downtime
- Use Discord webhooks to send status updates to your gaming community
Game-Specific Save Locations
Each game stores its critical save data in different locations. Here’s where to find them for backup purposes:
Valheim:
- Windows:
%UserProfile%\AppData\LocalLow\IronGate\Valheim\worlds\ - Linux:
~/.config/unity3d/IronGate/Valheim/worlds/ - Critical files:
[WorldName].dband[WorldName].fwl
Project Zomboid:
- Windows:
C:\Users\[Username]\Zomboid\Saves\Multiplayer\[ServerName]\ - Linux:
~/Zomboid/Saves/Multiplayer/[ServerName]/ - Critical files: Entire directory, especially
map_*.binandmap_t_*.bin
DayZ:
- Windows:
C:\DayZServer\mpmissions\dayzOffline.chernarusplus\storage_1\ - Linux:
~/dayz-server/mpmissions/dayzOffline.chernarusplus/storage_1/ - Critical files: Entire directory structure under storage_1
ARK: Survival Evolved:
- Windows:
C:\ARKServer\ShooterGame\Saved\SavedArks\ - Linux:
~/ark-server/ShooterGame/Saved/SavedArks/ - Critical files:
[MapName].ark,[MapName].ark.backup, and*.arkprofilefiles
Palworld:
- Windows:
C:\Palworld\Pal\Saved\SaveGames\ - Linux:
~/palworld-server/Pal/Saved/SaveGames/ - Critical files: All files in the directory
💡 Pro Tip: For critical servers, implement a 3-2-1 backup strategy: 3 copies of your data, on 2 different media types, with 1 copy stored off-site (like cloud storage).
Game Server Monitoring Tools
Generic server monitoring tools are great, but game servers benefit from specialized monitoring:
-
GameServerMonitor (https://gameservermanager.com/)
- Purpose-built for game server monitoring
- Player count tracking
- CPU/RAM usage specific to game processes
- Uptime monitoring with alerts
- Free tier available for up to 3 servers
-
Pterodactyl Panel Monitoring
- If you’re using Pterodactyl, it has built-in resource monitoring
- Graph visualization for CPU/RAM/Disk
- Alert integration with Discord/Slack
- Usage history for capacity planning
-
LinuxGSM Monitoring (Linux Game Server Manager)
- Built-in monitoring for all supported games
- Email and Discord alerts
- Automatic restart on crash
- Daily check and report
-
DIY Discord Bot Monitor
- Create a simple Discord bot to report server status
- Can display current player count and server status in channel name
- Allows players to check server status with commands
- Example repository: https://github.com/GameServerMonitors/discord-bot
Personal experience: I’ve found that a combination of system-level monitoring (CPU/RAM) plus a game-specific uptime checker works best. My setup uses Grafana for system metrics and a custom Discord bot that pings each game server every 5 minutes to verify it’s responding.
Linux-Specific Optimizations
If you’re running Linux (which I recommend), here are some essential optimizations:
Swap Space Configuration
Mini PCs often have limited RAM, making proper swap configuration important:
# Check current swap configuration
swapon --show

# Create a swap file if needed (16GB example)
sudo fallocate -l 16G /swapfile
sudo chmod 600 /swapfile
sudo mkswap /swapfile
sudo swapon /swapfile

# Make swap permanent
echo '/swapfile none swap sw 0 0' | sudo tee -a /etc/fstab

# Adjust swappiness (lower value = less aggressive swapping)
echo 'vm.swappiness=10' | sudo tee -a /etc/sysctl.conf
sudo sysctl -p
For game servers, I recommend:
- RAM < 16GB: Create swap equal to RAM amount
- RAM ≥ 16GB: Create 8GB swap
- Set swappiness to 10-20 (default is 60, which is too aggressive)
Filesystem Choice
The filesystem you choose can significantly impact game server performance:
- EXT4: Good all-around choice, balanced performance
- XFS: Better for large files, excellent for game servers with large world saves
- BTRFS: Good for SSDs with built-in compression, but avoid for mission-critical servers
- ZFS: Excellent data protection but higher RAM requirements
I personally use XFS for my game server drives due to its excellent handling of large files and minimal fragmentation over time.
Securing Your Game Servers
Game servers are increasingly targeted by attackers, especially popular ones. Here’s how to secure them:
Basic Security Measures
-
User Account Security
- Create a dedicated non-root user for game servers
- Set up SSH key authentication and disable password login
- Use
sudoonly when necessary
-
Firewall Configuration
# Ubuntu/Debian basic UFW setup sudo apt install ufw sudo ufw default deny incoming sudo ufw default allow outgoing # Allow SSH (change port if you've customized it) sudo ufw allow 22/tcp # Allow only specific game ports (examples) sudo ufw allow 2456:2458/udp # Valheim sudo ufw allow 16261:16262/tcp # Project Zomboid sudo ufw allow 2302:2306/udp # DayZ # Enable the firewall sudo ufw enable -
Fail2Ban Installation
sudo apt install fail2ban sudo systemctl enable fail2ban sudo systemctl start fail2ban -
Regular Security Updates
# Enable automatic security updates
sudo apt install unattended-upgrades
sudo dpkg-reconfigure -plow unattended-upgrades
Game-Specific Security
-
Admin Password Protection
- Use strong, unique passwords for all admin interfaces
- Change default passwords immediately
- Never share admin credentials with players
-
RCON Security
- Use non-standard RCON ports when possible
- Set strong RCON passwords
- Consider using an SSH tunnel for RCON access
-
Player Authentication
- Use whitelisting when possible
- Implement moderation tools and logs
- Consider authentication mods for games that support them
Real-world security tip: I’ve found that the majority of attacks on my game servers were brute-force attempts against SSH. Setting up key-based authentication and changing the default SSH port dramatically reduced these attempts.
By following these setup guides, you’ll have your game servers up and running on your power-efficient homelab. Remember that each game has unique resource requirements, so monitor performance and adjust settings as needed to ensure a smooth gaming experience for everyone.
Final Thoughts: Building Your Multi-Game Setup
There’s something deeply satisfying about hosting your own game servers. When I switched from renting expensive commercial servers to my mini PC setup, I not only saved money but gained full control over the games my friends and I love playing.
The hardware landscape has improved dramatically over the past few years. What used to require a power-hungry desktop can now run on these efficient mini machines. My initial experiments with a Ryzen 5800U were promising, but the newer Ryzen 6000 and 7000 mobile chips in these compact systems have been a revelation for game server hosting.
Will a mini PC replace a dedicated enterprise server? Of course not. But for small communities of 5-30 players across multiple games, these setups strike a sweet spot that’s hard to beat. The real bonus has been developing practical skills in Linux administration, networking, and performance tuning that have benefited my professional work as well.
If you’re on the fence about building your own game server homelab, I hope this guide gives you the confidence to take the leap. Start small, perhaps with just one game, and expand as you get comfortable with the setup. The learning curve can be steep at times, but the satisfaction of creating your own gaming community makes it worthwhile.
Happy server building! 🎮🔧
This article was last updated on April 22, 2025. If you spot any outdated information or have questions about particular server configurations, feel free to reach out.