When you work with linux or any unix based operating system, everything is treated as a file. Be it the directories, source code files, binaries, or anything else, everything is stored as a file in linux. You can trying opening a directory in vim (using the command vim office_work_directory) to see what happens. I would recommend against directly editing a directory file though. It’s just fun to see what is actually stored in a directory file.
When you start using linux, you’ll be working with a lot of plain text files or various source code files if you’re a programmer. This article aims to help you achieve a bit of fluency with files in linux. You’d be surprised to know that even file extensions don’t really matter inside a terminal, you could have a C program file with an extension of ‘.com’ and then try compiling it with gcc, and what you’ll see is, it just compiles normally. This is true for mostly all the commands, but there are a few exceptions like javac, which check for file extension as well.
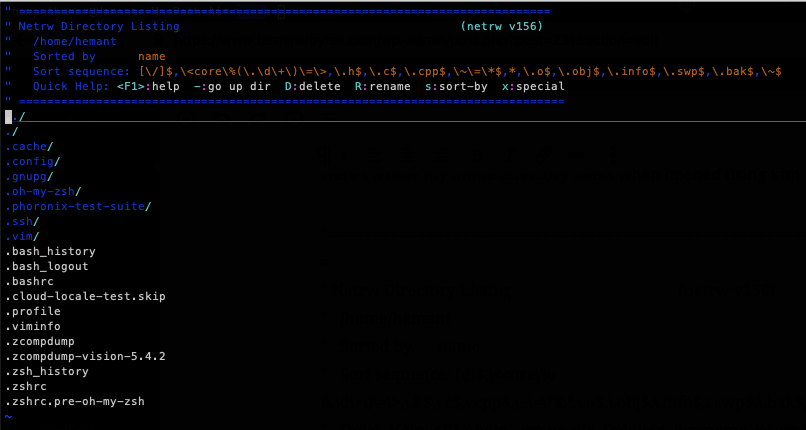
Here’s a how my home directory looks when opened using vim:
vimBasic Linux Commands For File Manipulation
In this article I have compiled a list of basic linux commands for file manipulation and compression. These are some commands that you’ll use everyday if you’re working with a linux machine. You’ll probably be knowing a lot of these commands (or all of them) if you have worked with linux. However, if you’re a beginner, make sure to check out the Top 10 Linux Commands, especially the part where I have explained the cd, ls and pwd commands. It’ll help you navigate the files from using just command line.
1. The cp command – copy files
cp command is used to copy a file from one location to the other. This command can be used to copy a single file, multiple files or the whole directory from one location to the other. All of the commands mentioned here have so much more functionality than this article will cover. But it’s not possible for me to write about each and every option. Therefore, I only get into so much detail that an expert to medium level programmer will need when working with linux. In addition to the options stated here, you can read all the details using the man command.
cp Command Examples:
Note: Files with a name starting with a period `.` are hidden files in linux. Do not confuse this with just period (`.`), it denotes current directory. For instance, “.bashrc” is a configuration file for bash which is hidden from the user in GUI, but not inside a terminal, you can view the hidden files of a directory by using ls -al.
# Copy the file /home/user/.bashrc to /tmp directory
cp /home/user/.bashrc /tmp
# If you’re currently in the "/home/user”directory, you can simply use
# Here the first period denotes the present working directory.
cp ./.bashrc /tmp
# Copy a whole directory called “work” to a new location “/tmp/“.
#-Rdenotes recursive, i.e copy all subdirectories too.
cp -R ./work /tmp/
# Copy all the files in “work” directory to “/tmp” but not the subdirectories and their files.
cp /work/* /tmp/
2. The mv Command – moves files
This command is similar to the cp command with just one significant difference. Instead of copying the files, it moves them from one location to the other. In other words, this command cuts the file from one location and pastes it on the provided location.
Examples of the mv command:
# Move the file /home/user/.bashrc to /tmp directory
mv /home/user/.bashrc /tmp

# You can also use the shortcut “~/“ which denotes your home directory
# i.e. “/home/user”, where ‘user' is your username.
mv ./.bashrc /tmp

# Move a whole directory called “work” to a new location “/tmp/“.
# The  `-R` option denotes recursive, i.e move all subdirectories too.
mv -R ./work /tmp/

# Move all the files in “work” directory to “/tmp” but not the subdirectories and their files.
mv /work/* /tmp/
3. The rm command – remove files
As the name suggests, this command is used to remove files from the system. Be careful with this one, if used improperly with superuser rights, this command can wreck your operating system.
Examples for rm command:
# Remove the file named “temporary.txt” located at the current user’s home directory.
rm ~/temporary.txt

# Remove all the files in the “/tmp/work“ directory.
rm -r /tmp/work/*

# Force delete files, without asking for any confirmation or checking permissions.
rm -rf /tmp/work/*

# Force delete the whole directory “/tmp/work”
rm -rf /tmp/work
This command can be highly dangerous if run on the root (/) directory with superuser rights (sudo). Basically what the following command does is tell the system to remove all the files located at the system root. The root directory is the parent directory for all system and user directories. Obviously, if you have no files, then there won’t be an operating system. Recently, in some linux systems to prevent accidental usage of the command a --no-preserve-root has been added. Without this flag, the command won’t work if you run it on the root directory. You have been warned.
# DO NOT RUN THESE COMMANDS, THEY REMOVES ALL SYSTEM FILES
sudo rm -rf /

# This will definitely kill the system and would require a OS reinstall.
# Use this only on your rival's system.
sudo rm -rf --no-preserve-root /
4. The mkdir command – make directories
mkdir stands for Make Directory. Using the mkdir is easy, it just creates a directory on the provided location.
Usage of the mkdir command:
# Create a subdirectory inside the directory “/tmp”
mkdir /tmp/new_work

# Create the directory ‘java' and automatically create all the other directories in the specified path if they don’t exist.
# For instance, here '/tmp/old_work’ does not exists, and will be created automatically.

mkdir -p /tmp/old_work/java
5. The chmod command – change modes
This command is used to change the access rights/modes of a file or a directory. chmodcommand can be used in two modes, both of them are explained further in the article.
Syntax for chmod:
# Options are the command options, and permissions are
# the access permissions we want to set

chmod options permissions filename
Using chmod in Symbolic Mode
First you need to understand what all the symbols actually mean.
Symbol Type Description u owner The owner of the file. g group Members of file’s group.o others Everyone else apart from the file owner and group members.a all Everyone.
Permission symbols
Symbol Description r Permissions to read the contents of the file. w Write permission.x Permissions to execute the file, or search the directory if it’s a directory.
Operands + Add permissions. - Revoke permissions.
Examples of chmod command:
The following command gives the owner of the file all three permissions to read, write and execute the file. Members of the group to which the file belongs to, can only read and execute the file. Others can just read the file and can not execute it. chmod u=rwx,g=rx,o=r filename.py
# Allow write permissions to everyone on the file
chmod a+w filename.py
# Deny others to write on the file
chmod o-w filename.py
# Deny everyone read, write access, except the owner on the directory “.ssh”.
#-Roption is for recursive, that is all the files/subdirectories in the given directory.
chmod -R u=rw,g=,o= ~/.ssh
Using chmod in Numeric Mode
In the numeric mode, you specify the permissions using a three digit number. Suppose the 3 digit number is DEF, where D is the first digit and F is the last digit.
D Represents the permissions of the owner of the file.
E Permissions for the group to which the file/directory belongs to.
F Access permissions for others.
Syntax: chmod DEF filename
Numeric representation:
4 Permissions to read the contents of the file.
2 Write to the file.
1 Execute the file.
0 No permissions i.e deny read, write, execute.
You can add the numbers if you want to give multiple permissions in a single command. For instance, if you want to give read, write and execute permissions to the owner then D = (read + write + execute) -> (4 + 2 +1) = 7. And execute permission to the group then E becomes 1. F becomes 0, since we want to deny all permissions to others.
# Owner -> (4+2+1), Group -> 1, Others -> 0
chmod 710 filename.py

# Set the permissions for ".ssh” directory to be just read and writeable by the owner and no one else.
chmod -R 600 ~/.ssh/

# Set the permissions, owner -> rwx, group -> rx, others -> r
chmod 754 filename.py
6. The chown command – change owner
In linux or any unix based system, all the files are associated with a user and a group. chown command is used to change the ownership of a given file or a directory.
Syntax for chown command: chown user:group filename.py
Examples for the chown command:
# set the user “nick”, “admins" as new owner and group of the file 'filename.py'.
chown nick:admins filename.py

# set the user “www-data”, “www-data" as new owner and group of the directory ‘/var/www/wordpress`.

sudo chown -R www-data:www-data /var/www/wordpress

# If you’re not the current directory of the file, you need sudo to run this command.
7. The find command – find files
Finding a file is usually something you’ll need to do everyday if you work with command line. It’s one of the most basic linux commands, which is way faster than doing the same using GUI. This is the one command that probably doesn’t need much explanation, therefore lets directly go the examples.
Examples for the find command:
# Find the file named “terminalbytes.txt” in the current directory (denoted by `.`)
find . -name terminalbytes.txt

# Find the file named “terminalbytes.txt” regardless of the case, in the home directory.
find ~/ -iname terminalbytes.txt

# Find the directory named “terminalbytes” in the root directory (i.e the whole system).
find / -type d -name terminalbytes

# Find all the files with a 777 permission, in the current directory.
find . -type f -perm 0777 -print

# Find the file named “removeme.txt” and remove it.
find /home/user/ -type f -name "removeme.txt" -exec rm -f {} \;

# Find all the empty files in the user home directory.
find ~/ -type f -empty

# Find all the hidden files in the movies directory.
find /home/user/movies -type f -name ".*”

# Find the files changed in the last 10 mins in the whole system.
find / -cmin -10
Basic Linux Commands For File Compression
Linux provides a lot of utilities to compress files and directories. The most used ones that you’ll require in order to decompress files are listed here. However, for compression you can use any of the following for normal day tasks. If someday, for some reason you need to compress a really large file, then research about the compression ratio and compression times and find the best one for your use-case.
8. The gzip command – compression using Lempel-Ziv coding
According to wikipedia, gzip is based on the DEFLATE algorithm, which is a combination of LZ77 and Huffman coding. DEFLATE was intended as a replacement for LZW and other patent-encumbered data compression algorithms which, at the time, limited the usability of compress and other popular archivers. Read more on wikipedia.
gzip command examples:
# Compress multiple files into a single archive, this will remove the original files
gzip file1.txt file2.txt file3.txt

# Compress a file and keep the original copy, `-c` outputs the the compressed version to the standard output
# So we’re using `>` operator to write the compressed output to another file.
gzip -c file1.txt > file1.gz

# List all the compression stats using the `-l` option.
gzip -l file1.gz

# Compress more aggressively (compression level can vary from 1 to 9, 9 is the max compression and takes more time)
gzip -9 file1.txt

# Decompress the compressed archive.
gzip -d file1.gz
9. The tar command
tar is a short form for Tape Archives. Filed created using the tar command are often referred to as tarball. tar similar to gzip can be used to compress and decompress archives. In addition, tar can also be used to create a compressed gzip archive as well. This compression method is usually used to create large backup files.
tar command examples:
# Compress the files in the path /home/terminalbytes and create a archived named “terminalbytes.tar"
tar -cvf terminal.tar /home/terminalbytes/

# Decompress the above file
tar -xvf terminal.tar

# Compress the file into a gzip archive
tar -cvzf pythonfiles.tar.gz /home/user/python/

# Decompress the above gzip archive
tar -xvf pythonfiles.tar.gz

# List the contents of any compressed archive.
tar -tvf pythonfiles.tar.gz
10. The zip and unzip commands – compress and decompress zip files
zip command and unzip commands are useful because of their cross platform nature. If you want to share something with a friend who uses a Windows system then they’ll prefer a zip archive over the others. zip and unzip commands do not come pre-installed on most linux systems. So according to the distribution install them using apt-get or yum.
Installation: sudo apt-get install zip unzipsudo yum install zip unzip
zip Compression Examples:
# Compress multiple files into a single
zip file zip archive.zip file1.txt file2.txt file3.txt

# Compress all the files in the preset directory into a single
zip file zip archive.zip ./*
unzip Decompression Examples:
# Decompression is easy
unzip archive.zip
This concludes the list of basic linux commands for file manipulation and compression. I hope this article helped you in getting a bit more familiar with linux.